I have to warn you, these things are addicting. They are simple, creative, fun… You won’t be able to stop with just one! If you’re anything like me, you’ll keep coming up with new themes, color schemes, and pictures you want to use. But don’t worry, they are cheap too!
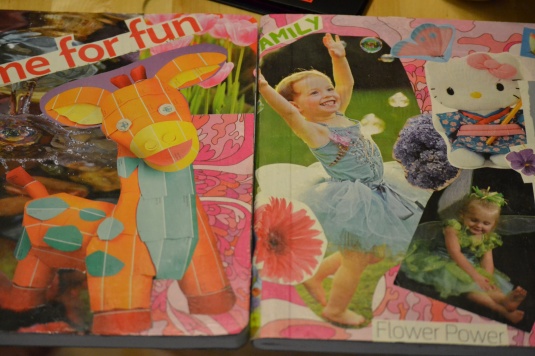
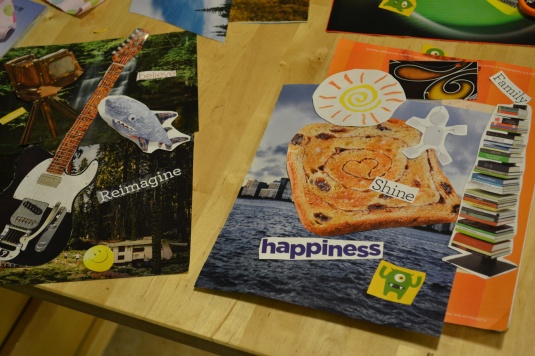
My sister and I had made some for the kids a while back and then Axel wanted to make one for Andrew for Father’s Day. We never had a chance, so while Andrew was away all last week we were able to get it done. The kids helped pick out their pictures and they love having notebooks that are just their style. Andrew loves that his was designed by his family!
Supplies Needed:
Composition Notebook (Around $1, found with all the other notebooks and folders)
Good Scissors
Foam Brush (I think I got a pack of 10 for a little over $1, found in the craft paint section)
Mod Podge- I used Matte, but it also comes in glossy. I was able to make about 30 notebooks with one large bottle. And no, I’m not that crazy! I was teaching a class of 3rd-5th graders. (Around $10 for a large bottle, found in the craft adhesives section)
Old Magazines, Calendars, etc. Just don’t use something like newspaper, because the ink will smear. Nature and wildlife magazines have great pictures in them, but I found many of the pictures on Andrew’s notebook in my Parenting magazine.
Don’t be timid. Cut more than you think you’ll need. I like to go through the magazines and tear out things I think I’ll use, and then go through the pile and trim them later. That way if I change my mind on the style of my notebook, I didn’t waste time cutting, and I have a lot to choose from. You can cut them out some super neat and on the lines or do some big and rounded. Words and letters are fun too. When I taught my class on these to the elementary students, some of them used letters to spell their names.
It is nice to have a large picture to start with as your base. You may be surprised at where you find them too. The pink on both of the girl’s notebooks is from a Splenda advertisement! Don’t worry about what it says, because you will be covering up a large majority of it.
When you are all done cutting out everything you are going to want to make a bit of a plan before you start with the Mod Podge. Lay your filler down and then place your other pictures where you think you want them. Most likely once you start gluing you will move things a bit, but it is good to know how everything goes together.
It is ok to let the pictures hang over the edges. We will take care of that later. Make sure you plan for wrapping around the binding though. My sister has one that is a long image that stretches from the front to the back. It is pretty neat. At this point you may want to take a digital picture to reference if you want to remember exactly how everything is.
Use the foam brush to apply a thin layer of Mod Podge to the backs of your images and place them on your notebook. Only do one piece at a time. Mod Podge dries super quickly, so you want to work fast with each piece. It is ok if you get some on the front of the images, but don’t lay them upside down in some of your mess while you are applying the adhesive to the backs. The paper will tear when you go to pick it up. You also want to be certain before you place your images because there is no moving them once you stick them. You could tear them off and use a different image, but again, the paper will tear. Be careful not to use so much Mod Podge that it goops over the edges because then your pages will stick together.
Once you have everything where you want it, open up your notebook and lay it flat. Apply a thin layer of Mod Podge over the entire cover. Again, be careful not to use too much around the edges. Make sure you get into the binding crack. While you are applying the top layer check to see if you have any loose corners on any of your images, and paste them down. It will look at little cloudy, but don’t worry because it will dry clear.
After the Mod Podge is completely dry (trust me it will be way easier if it is dry) trim all the excess off your edges.


Aug 02, 2011 @ 12:52:51
How fun that looks! Okay I am going to do that =) I have been wanting to try modge podge for a while!
Aug 02, 2011 @ 13:00:11
yes! i will get you hooked on ‘crafty’ with me!!!
Nov 22, 2012 @ 12:46:55
Thank you for this. I have some original sketches that I wanted to get onto notebooks and this will work out just fine.